Invoices (approval & payment)

Route incoming bills for approval and track them to payment

Upload a bill as PDF or photo and the amount and due date are read for you. Approvers get an email with a no-login review link. Approved bills wait in the unpaid list until you record payment — with a vendor ledger built in.

Who uses it:ManagersStaff
What it does

Read & submit

Amount and due date suggested from PDF, PNG, JPG or HEIC.

Approve by email link

One single-use link per approver, valid for 7 days.

Unpaid & paid

An unpaid list by due date; paid bills move to history, with CSV.

Vendor ledger

Payment methods, accounts and W-9s; account numbers are encrypted and masked.

How it flows

  1. 1Staff
    Upload the bill

    Confirm vendor, amount, due date and approvers, then submit.

  2. 2Automatic
    Approvers notified

    With a review link; the pending count shows in the menu.

  3. 3Office
    Approve or reject

    On screen or from the email link.

  4. 4Office
    Pay & record

    Pay from the unpaid list and mark it paid.

See the screens

Admin (office)

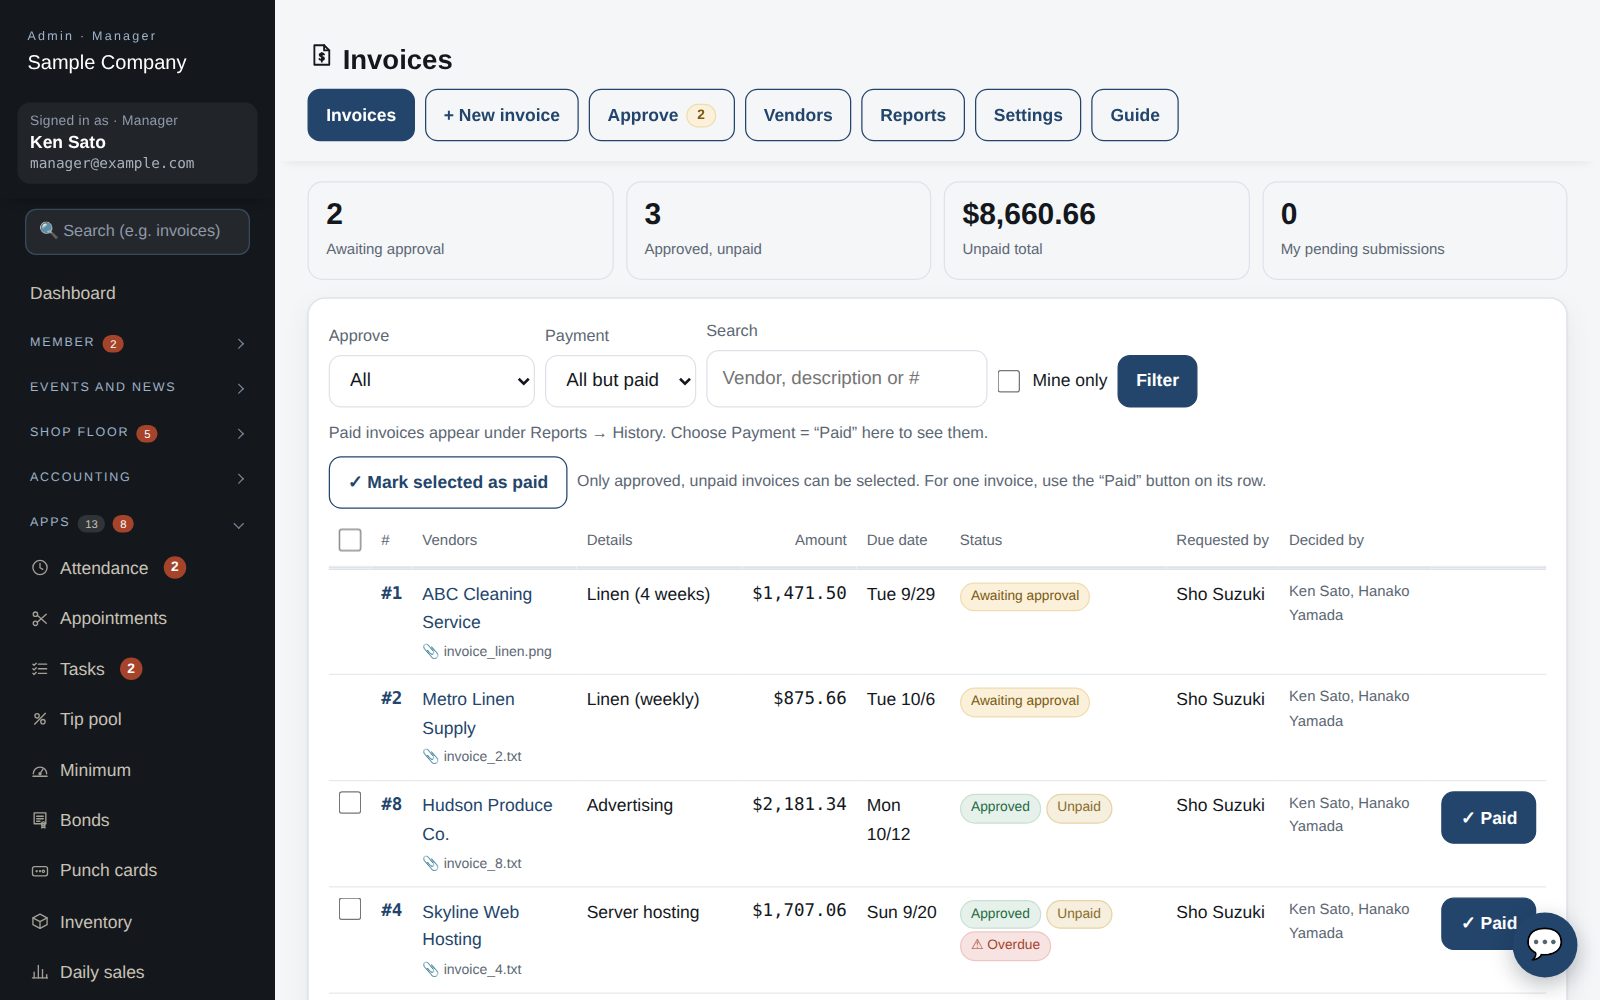
Invoice list: pending / unpaid counts on top, the list below

The screens

  1. Open it from Admin → Apps → Invoices. The buttons at the top switch screens: Invoices (list) / New invoice / Approvals / Vendors / Reports / Settings.
  2. The list is ordered pending → approved → rejected. Paid invoices are hidden (filter Payment = Paid, or use Reports → History).
  3. Click a number (#) to open the invoice, where you can edit, approve or mark it as paid.
  4. Who can do what: staff submit invoices and register vendors (bank details hidden). Managers approve, pay, run reports and edit email templates. Owners can do everything, including a full data reset.
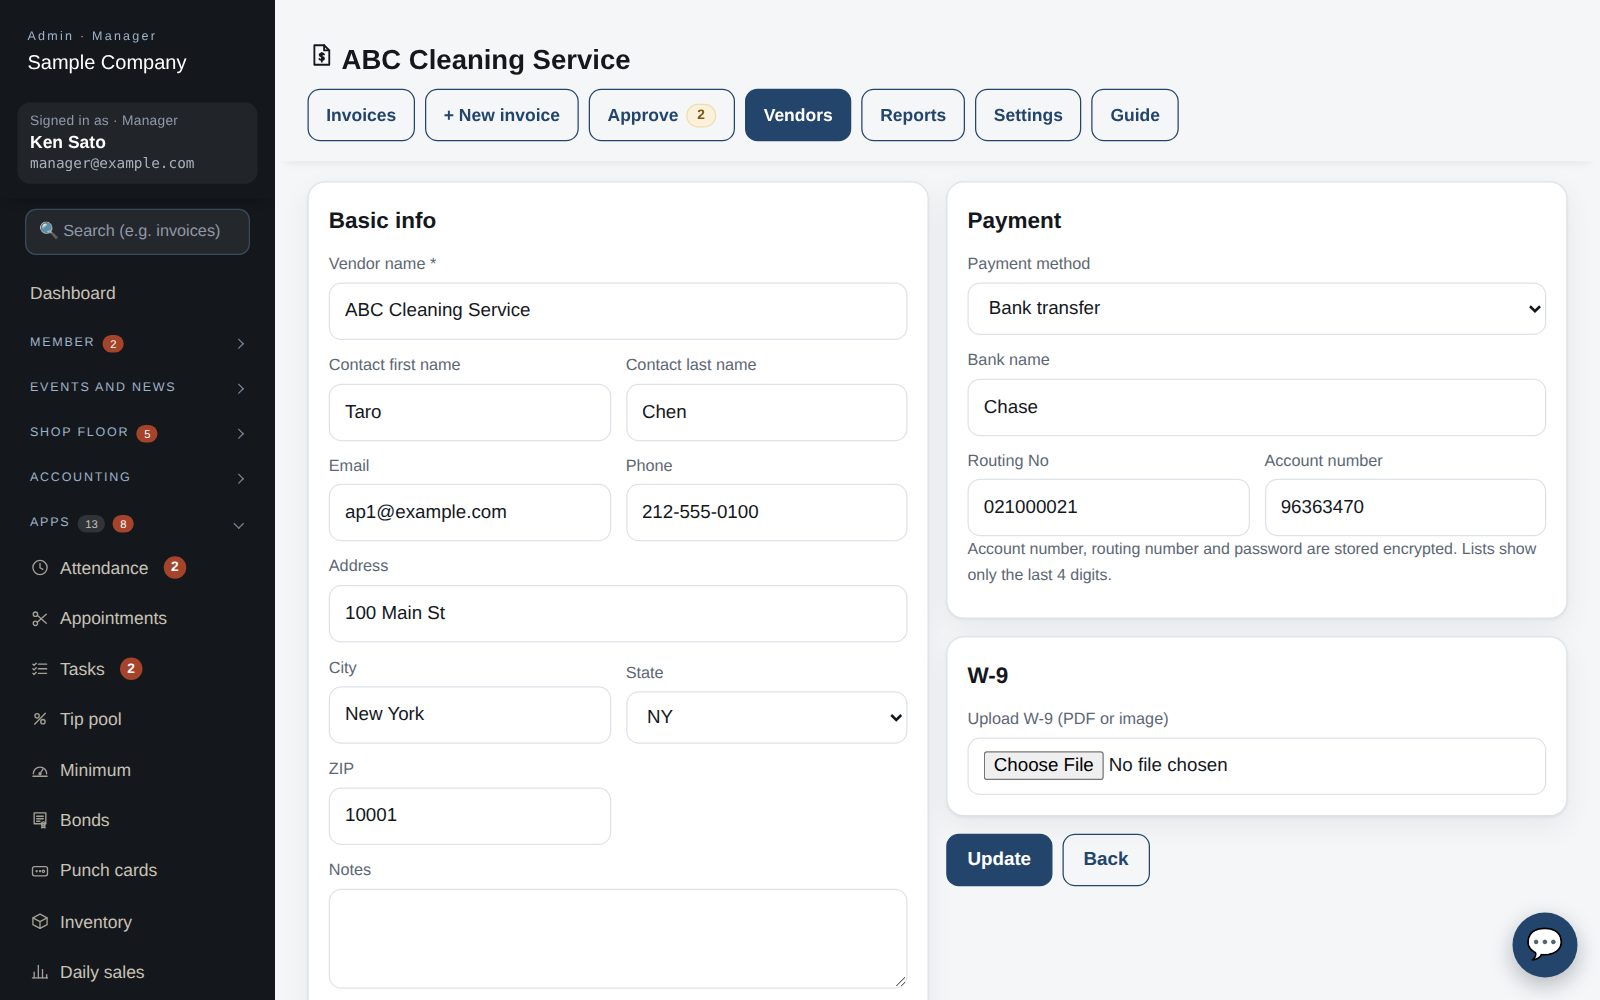
Vendor form; bank and web details appear only for managers and up

Register vendors

  1. Under Vendors → Add vendor, a name alone is enough (you can also add one from the invoice screen).
  2. Address, contact, payment method (bank / check / Zelle / web / other), bank details and W-9 can be added later.
  3. Account number, routing number and web password are stored encrypted; lists show only the last 4 digits and CSV exports omit them.
  4. To add many at once use “Import from CSV”: download the template, fill it in with the same columns, then review adds and duplicates on the preview screen.
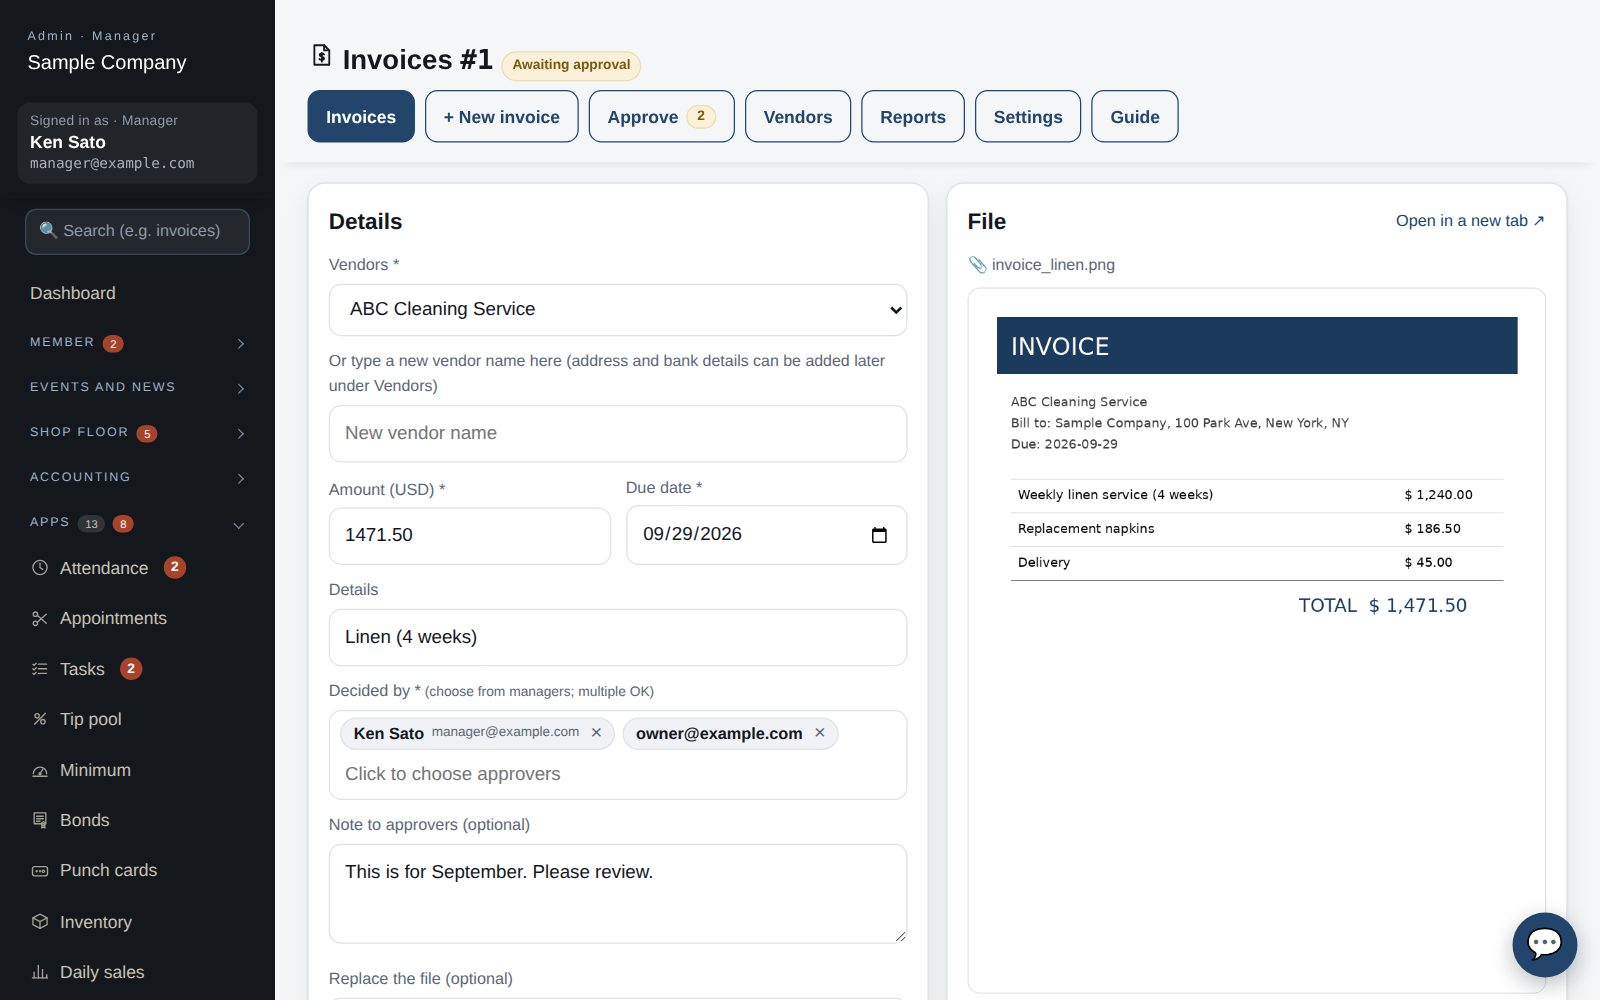
Single invoice: details on the left, file and history on the right

Upload and submit an invoice

  1. Under “New invoice” upload a PDF or a photo (PNG / JPG / HEIC). The amount and due date are guessed and shown on the next screen.
  2. Enter the vendor (or type a new name), amount, due date, description, approvers (managers and up, multiple OK) and a note.
  3. “Submit” makes it pending and emails the approvers (with a no-sign-in review link valid for 7 days). Use “Save as draft” to finish later.
  4. After submitting, the details and file can still be edited until it is paid (by the submitter or a manager).
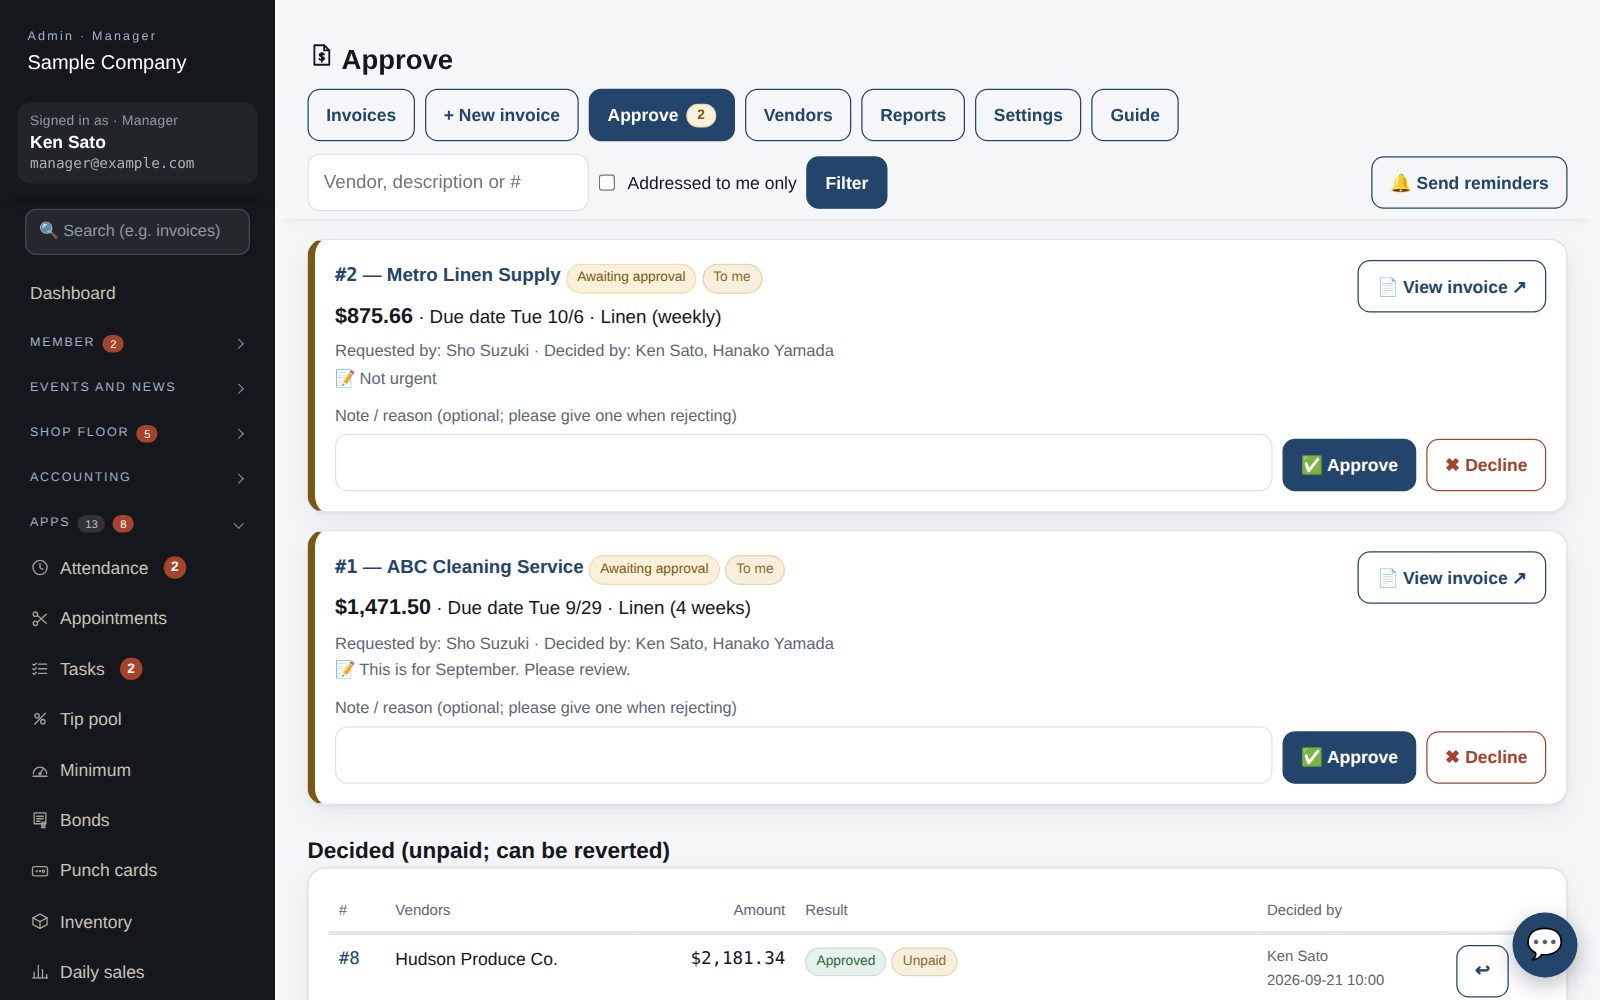
Approvals; items addressed to you have an orange bar

Approve or reject

  1. Pending invoices appear under “Approvals”; those addressed to you come first with an orange bar. Tick “Addressed to me only” to filter.
  2. Check the file with “View invoice”, add a note (a reason when rejecting) and press Approve / Reject. The submitter is emailed.
  3. Only the listed approvers can decide; owners may act on anyone's behalf. Made a mistake? Use ↩ under “Decided” to put it back to pending (no notification).
  4. Approvers can also decide from the email link (see “Email link” below). “Send reminders” emails everyone who has pending invoices.
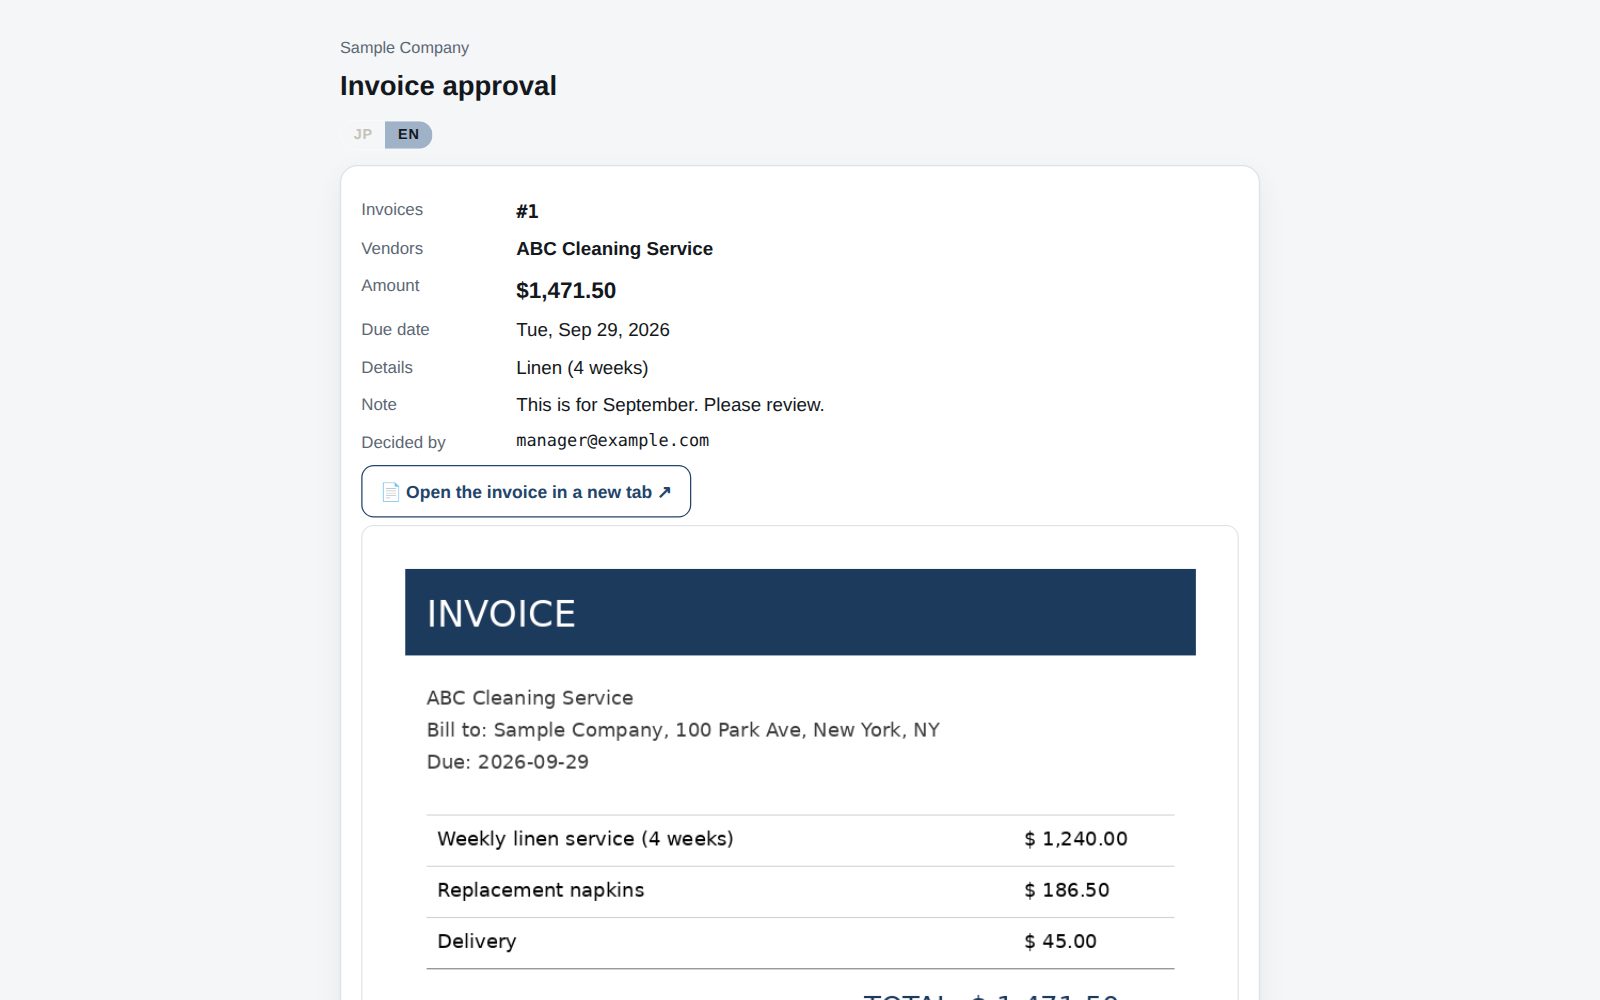
The review page opened from the email (phone). No sign-in needed

Approving from the email link

  1. The “Review and approve/reject” link in the email opens a page showing just that invoice. No sign-in is needed.
  2. Check the file and press “Approve”, or enter a reason and “Reject”. Nothing changes until you press (safe even if a mail scanner opens the link).
  3. Each approver gets their own single-use link that expires after 7 days. Ask for a reminder if it has expired.
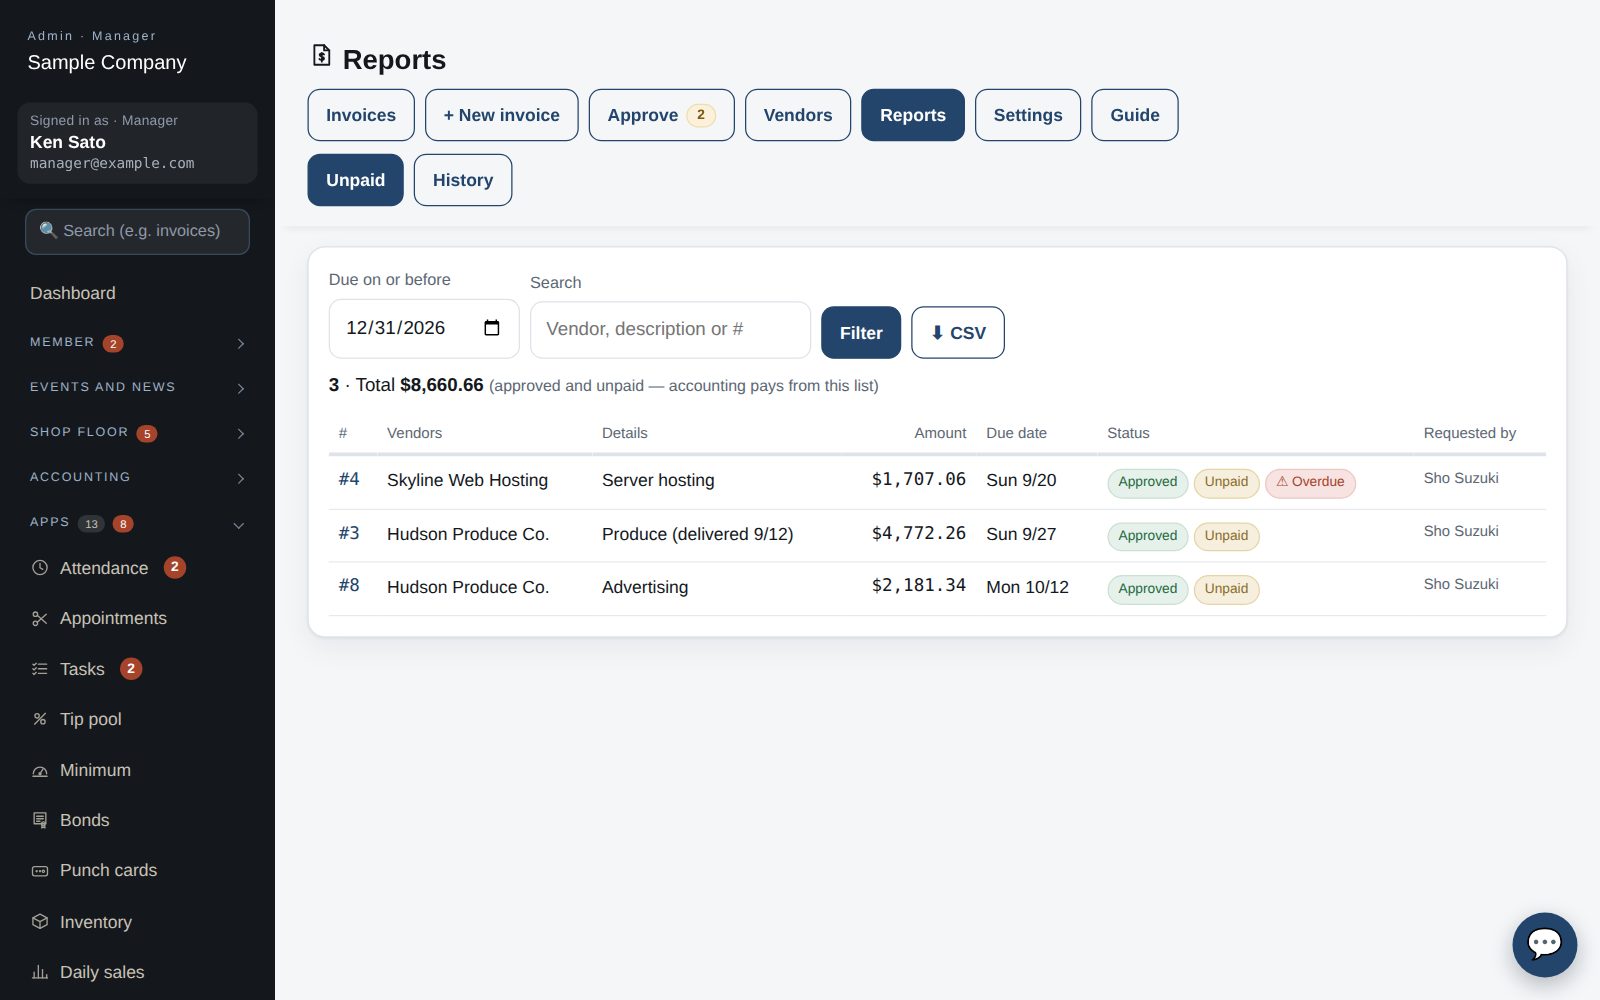
Reports → Unpaid: the payment list in due-date order

Paying and reports

  1. “Reports → Unpaid” lists approved, unpaid invoices. Filter by “Due on or before” — accounting pays from this list. CSV export available.
  2. After paying, open the invoice and press “Mark as paid”. The payment date is recorded and it moves to History. “Back to unpaid” undoes it.
  3. “Reports → History” filters by period, approval and payment status, with CSV export (for your accounting software).
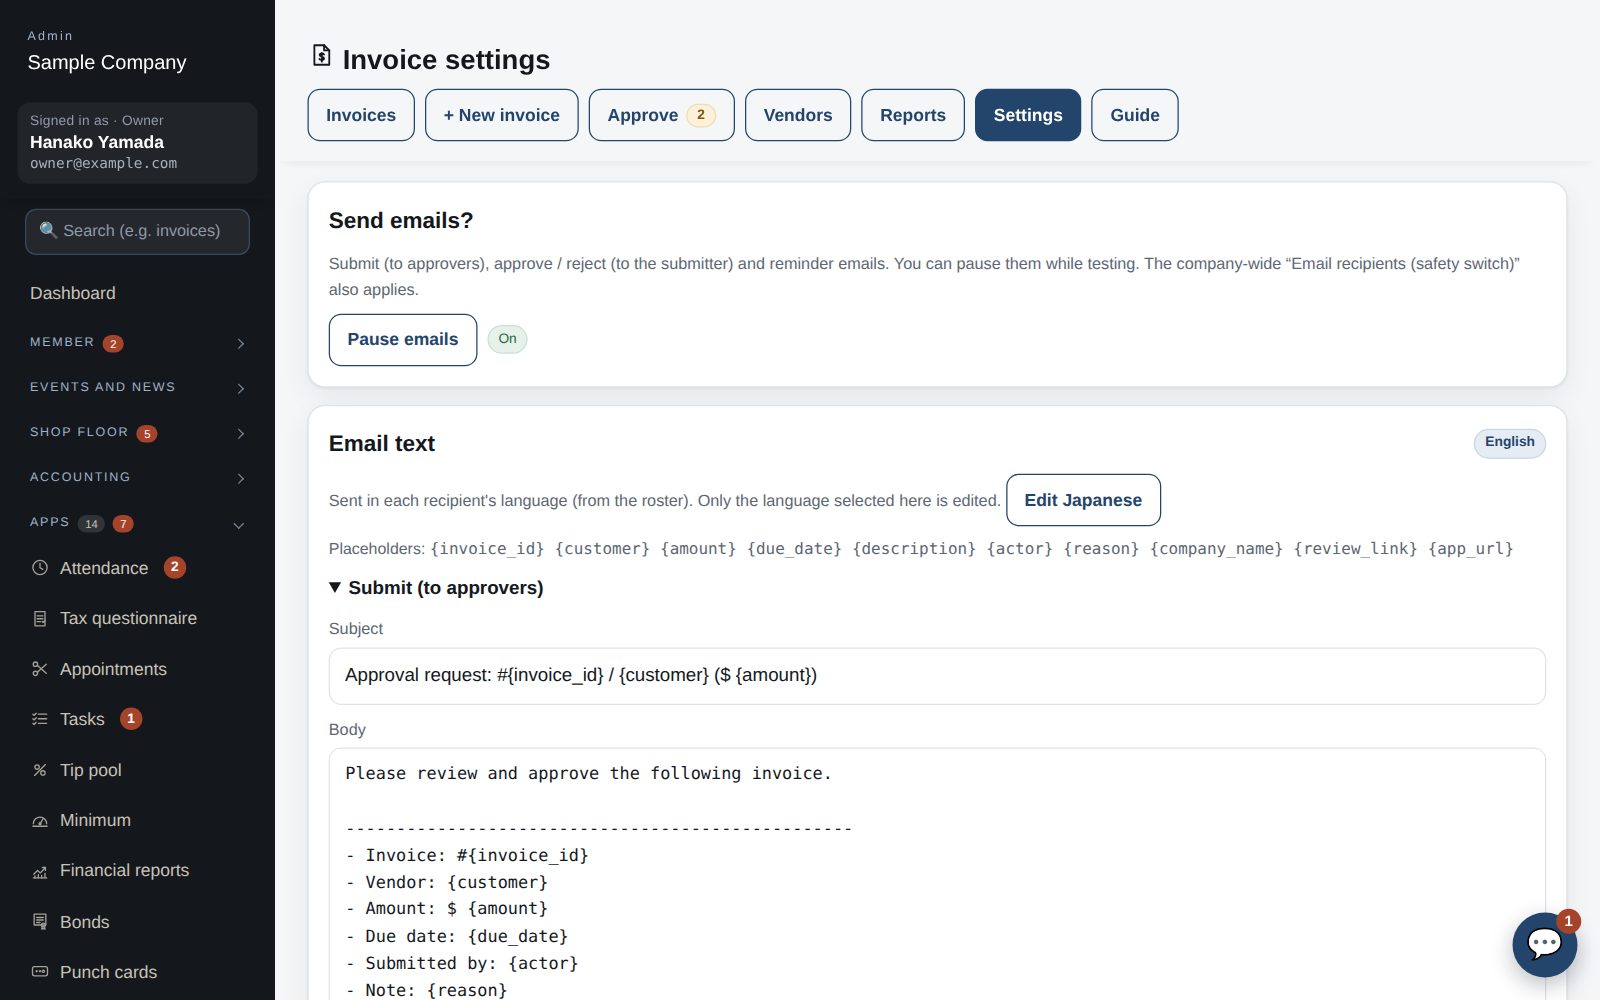
Invoice settings: pausing emails and editing templates

Settings: email

  1. “Pause emails” stops submit / approve / reject / reminder emails for this company only (useful while testing or right after an import).
  2. The company-wide “Email recipients (safety switch)” (Settings → Email) also applies: in “Trial” mode only administrators and the allow list receive mail.
  3. Email templates are edited per language. The current display language is shown; switch with “Edit English” / “Edit Japanese”. Each recipient gets their own language (from the roster).
  4. Danger zone (owner only): deletes every invoice, vendor, template and file. Type DELETE to run. This cannot be undone.

Works well with

Start with just the features you need. If nothing fits the way you work, we'll build it for you — free.

Get started →🎁 Get a custom app, free