Membership bonds

Application, payment, certificate, e-signature, letters and ledger

Take corporate membership bonds from application and payment through certificate issue, e-signatures by the secretary and chair, extension notice letters, delivery and receipt — all tracked in a ledger that can import your accounting Excel.

Who uses it:ManagersMembers & guests
What it does

Application & payment

Tax and totals calculated; record checks and receipt dates.

Certificate & e-sign

Generate the PDF and request two signatures by email.

Letters & receipt

Word or PDF letters; receipt confirmed via email link.

Ledger

Filter by series and date, see yearly totals, redeem or reissue.

How it flows

  1. 1Office
    Register the application

    Company, series, face value and date.

  2. 2Office
    Confirm payment

    Check number, amount and date.

  3. 3Office
    Certificate & signatures

    Create the certificate and request e-signatures.

  4. 4Automatic
    Signed

    When both sign via their links it's complete.

  5. 5Office
    Send the letter

    Email the certificate and letter, with receipt confirmation.

See the screens

Admin (office)

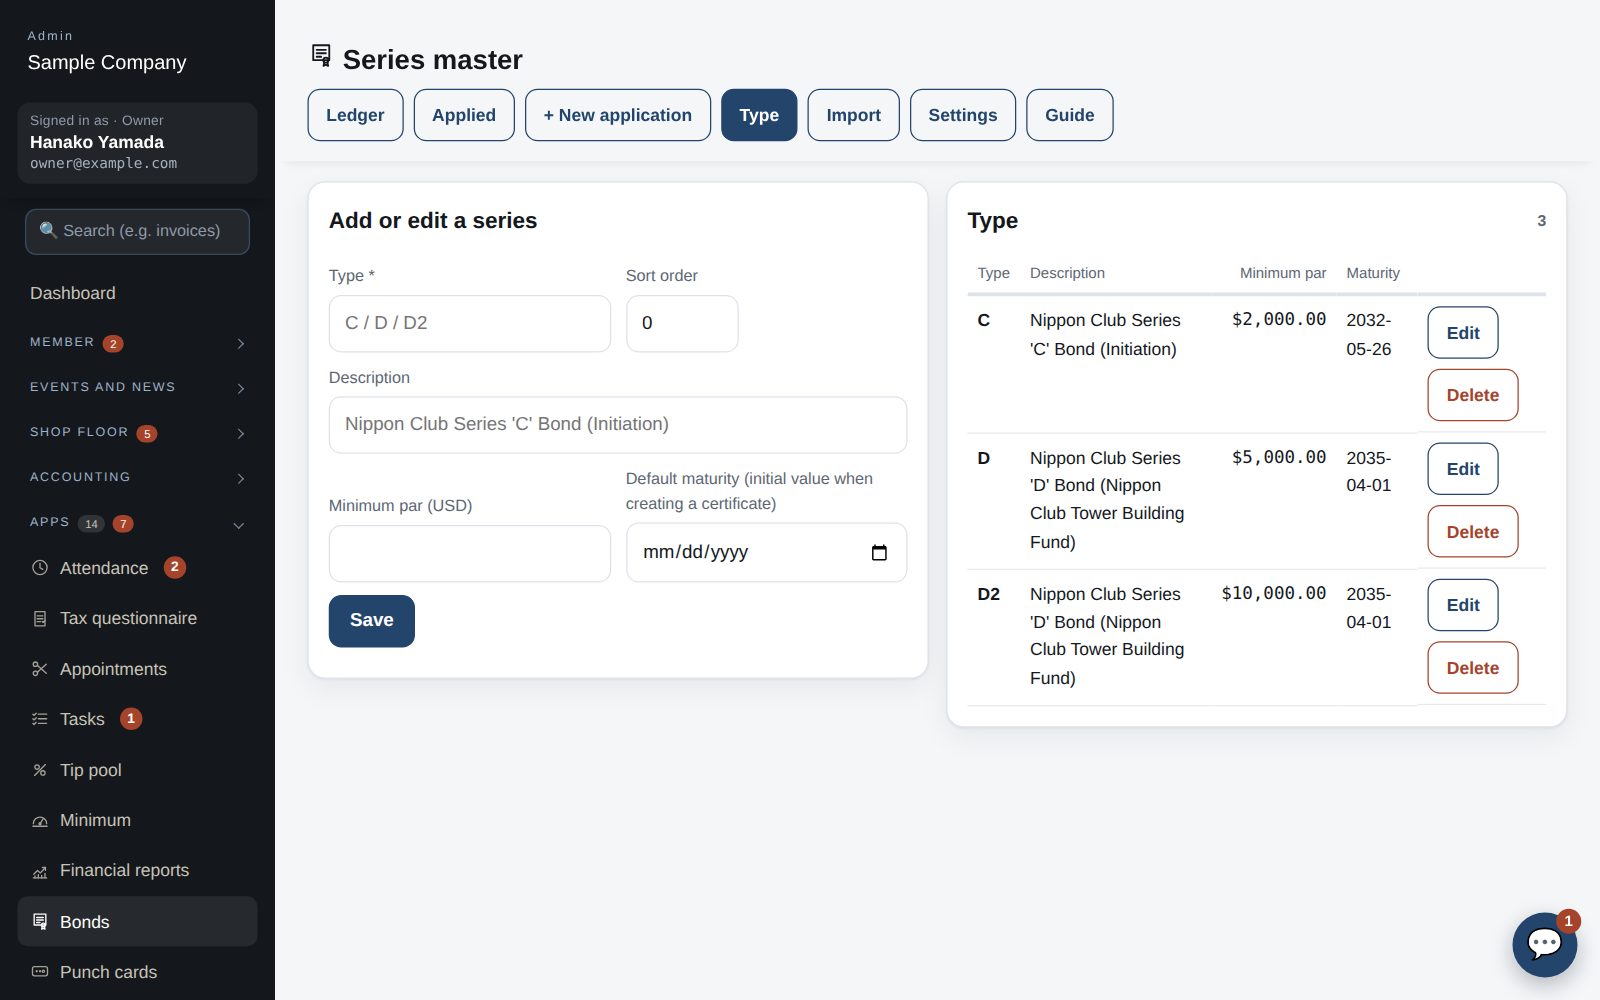
Series master: description, minimum par and default maturity for C / D / D2

Register the series

  1. Under Apps → Bonds → Series, register C, D, D2 and so on with a description, minimum par and default extended maturity. They become the defaults for applications and certificates. In Settings, set the club address, default officer title and tax rate.
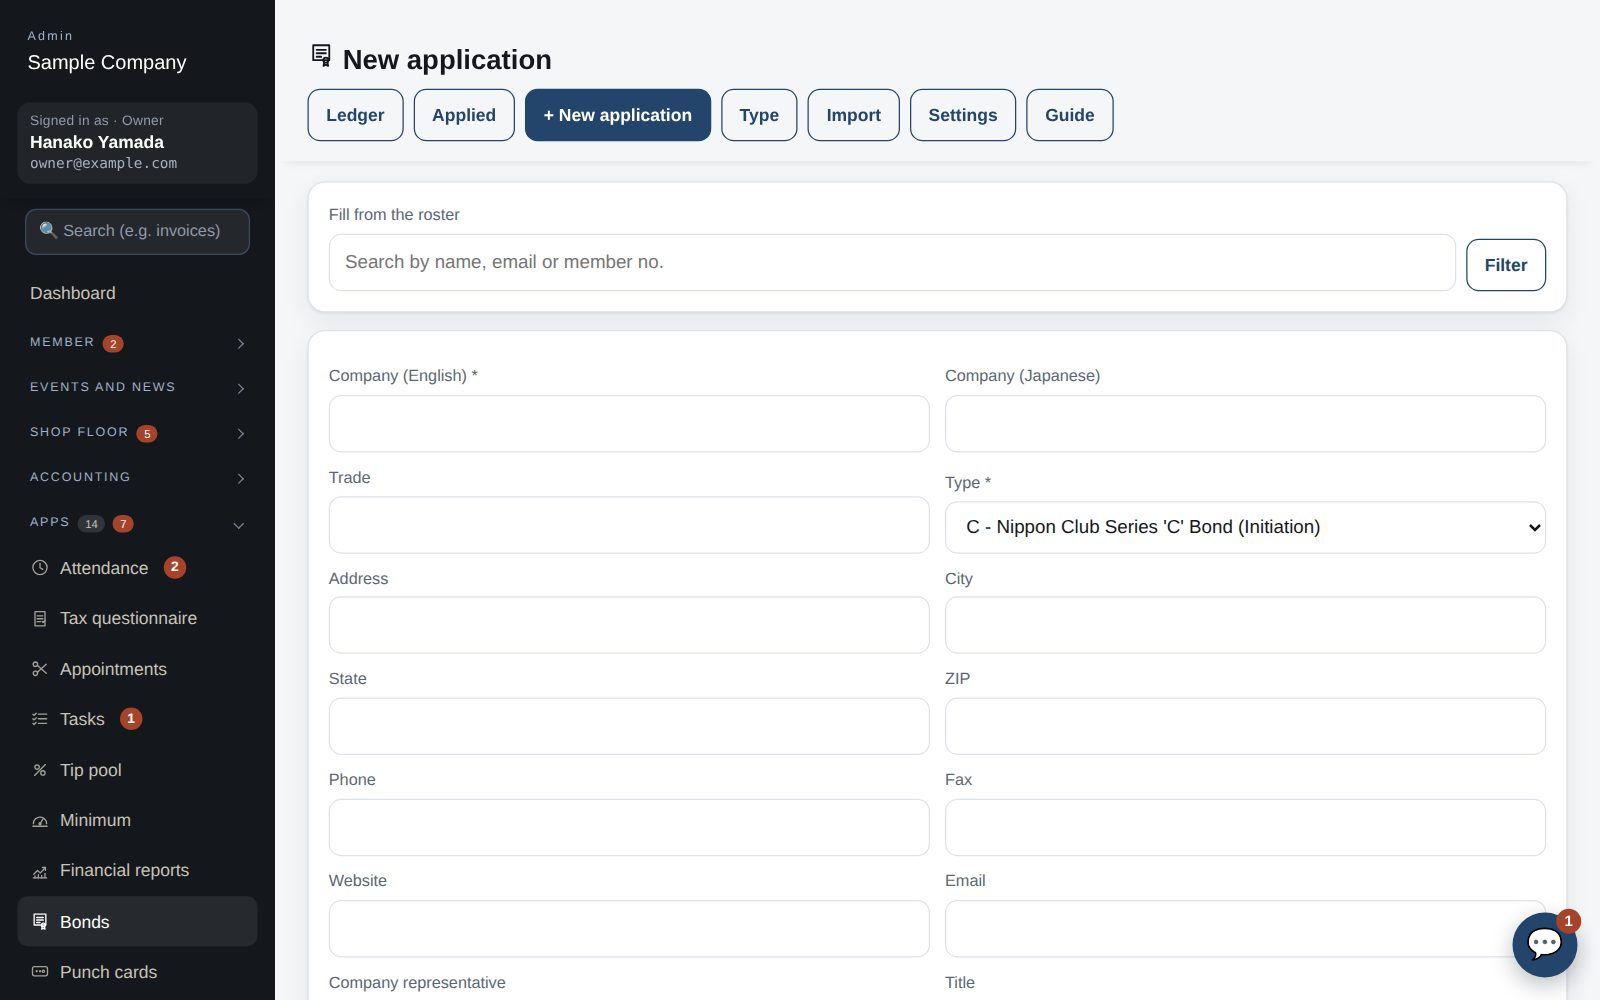
New application: company details, series, par, tax and applicant signature

Register an application and record the payment

  1. Under “New application” enter the company details, series, par value, application date and applicant signature. Picking a roster member fills in the address. The NYC sales tax and total are computed.
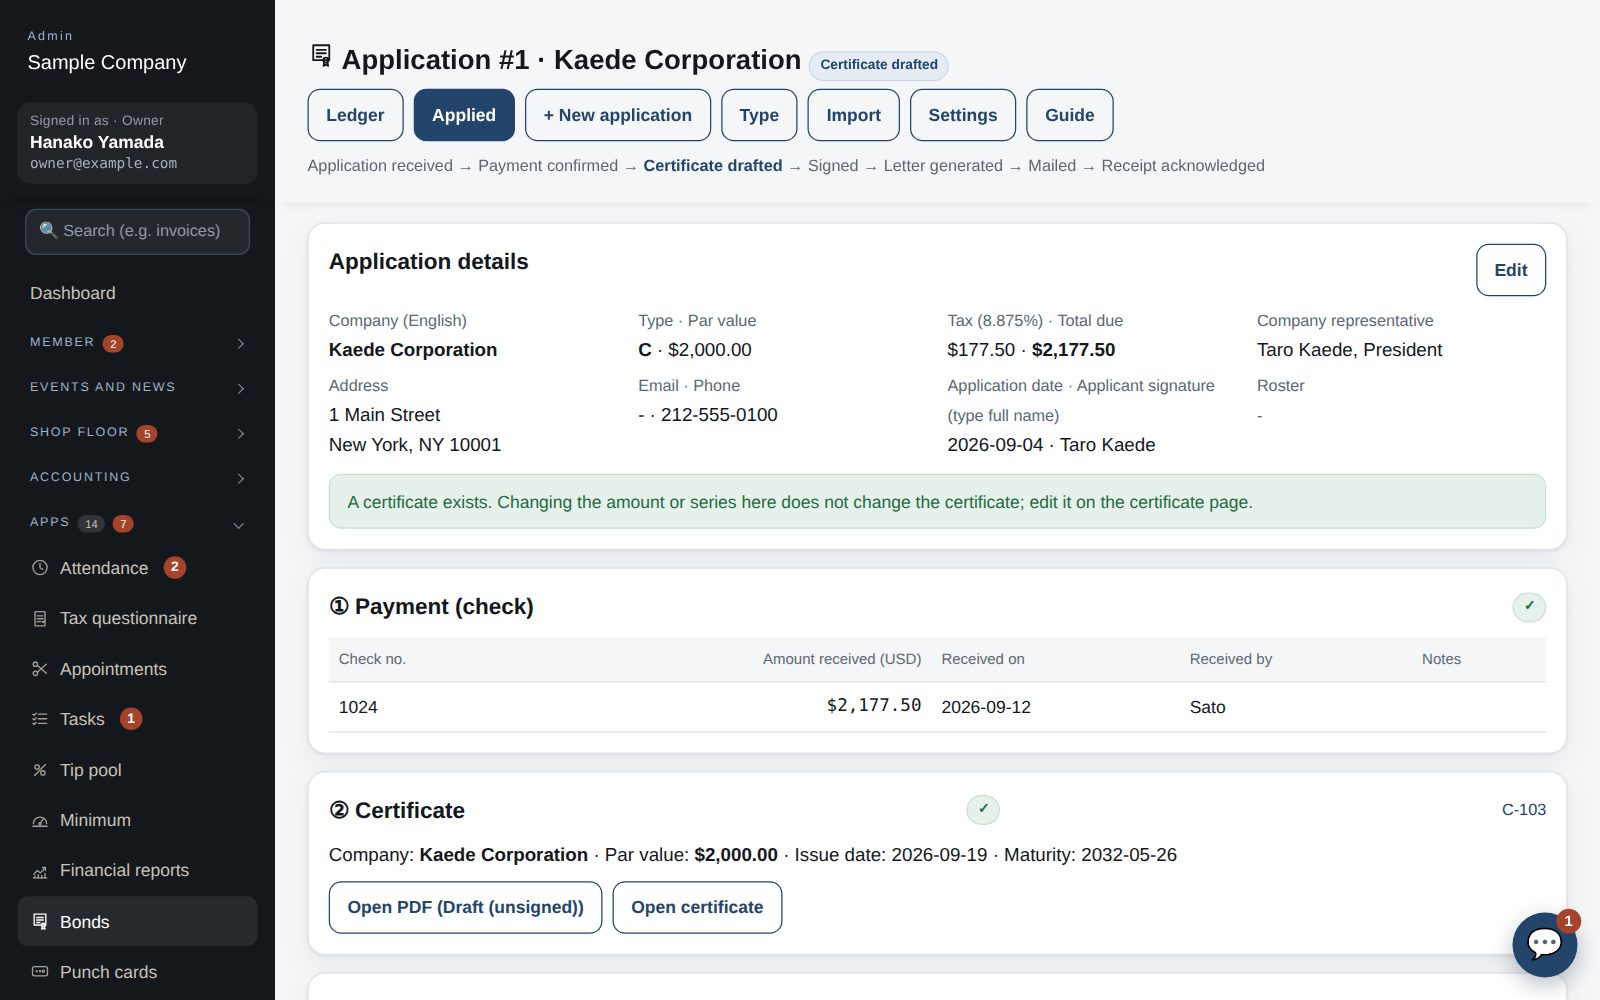
  2. On the application page, “① Payment” takes the check number, amount and date; the status becomes “Payment confirmed”.
Application page: payment → certificate → signatures → letter → mailing, top to bottom

Create the certificate and collect signatures

  1. Under “② Certificate” confirm the bond number (the next one is pre-filled), payee, par, issue and maturity dates, then “Create certificate”.
  2. Under “③ E-signatures” email a signing request to the Secretary and to the President. Each reviews the certificate PDF through the link and signs (valid 14 days, once; resending voids the earlier link). With both in, the status is “Signed”.

Generate and send the extension notice letter

  1. Under “④ Extension notice letter” confirm the attention line, officer and recipient address, then “Generate letter”. Download as Word or PDF. The letter date is fixed to the day it was generated.
  2. Under “⑤ Email / mailing” send the certificate and letter as attachments; the mailed date is filled and the status becomes “Mailed”. With “get the acknowledgment through an e-mail link”, the acknowledgment date is recorded when the recipient confirms through the link, the status becomes “Acknowledged”, and the acknowledged letter (PDF, with name, time and verification code) is kept here — no signed copy to return. For post only, enter the dates by hand.
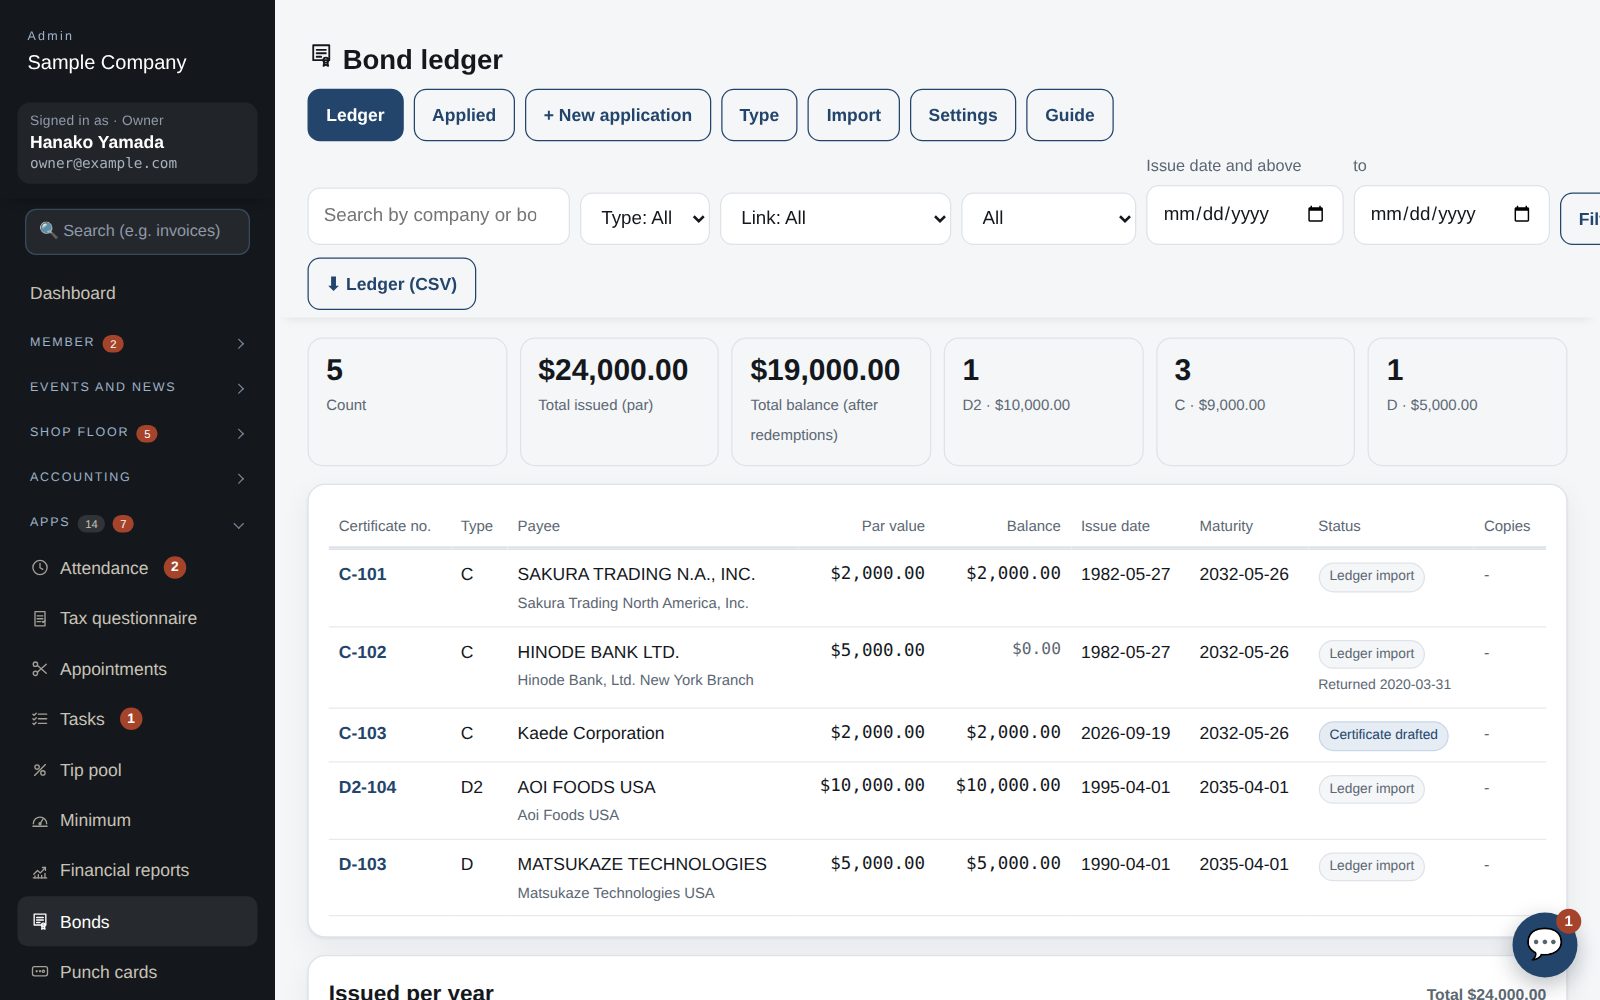
Ledger: filter by search, series, source and issue date; issued per year

Ledger: search, redemption, reissue

  1. Corporate (company) members can see their company's certificates in the member app under Home → “Other apps” → “Bonds” (read-only; regular members don't see it). Certificates are linked by the roster company members' “Company” (the company name from Join It). After syncing Join It, “Auto-link” below the ledger links every certificate whose company name matches (differences such as Inc., USA or New York Branch are ignored). Filter the rest with “Link: not linked” and use “Link to a company” on each bond page to pick the roster company (bonds with the same company name can be linked together). Choose which categories count as company members under Member roster → Categories.
  2. The “Ledger” lists every certificate, new and imported. Filter by company, bond number, series, source and issue date; see the count, total issued, total balance and issued per year. CSV download available.
  3. Click a bond number for its page: open the PDF or save a copy, edit, link to a roster member, reissue (same number, reason recorded), redeem (full or partial; updates the balance and return date), email it, and see the history.
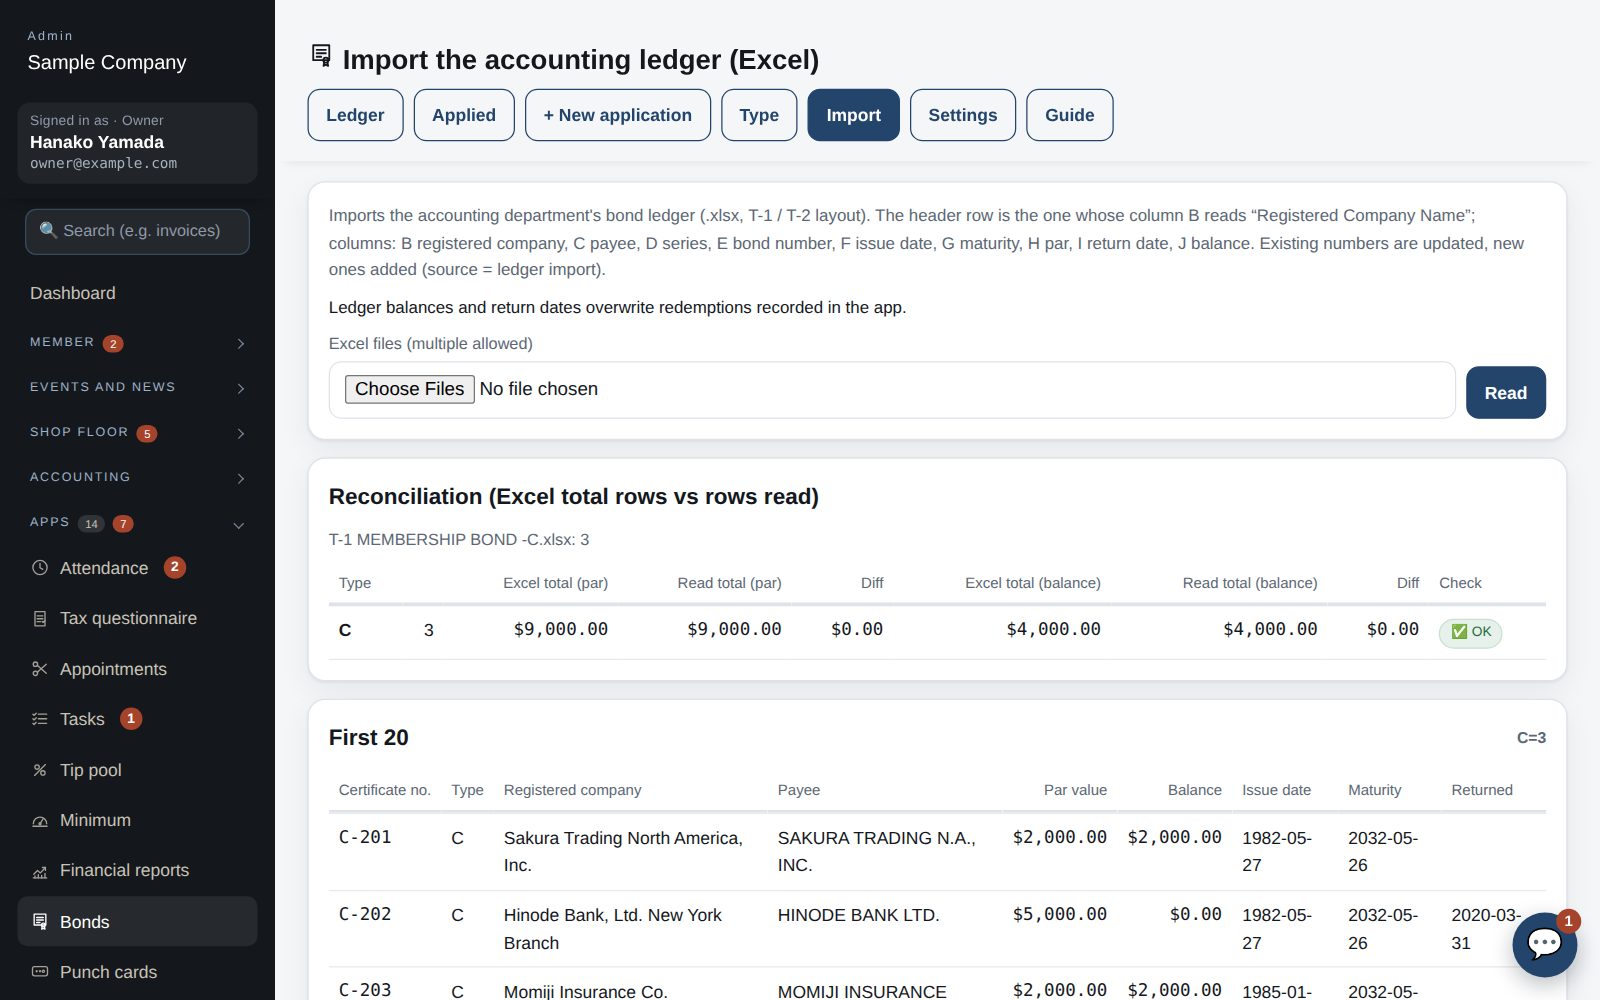
Import: rows read, reconciled against the Excel total rows

Import the accounting ledger (Excel)

  1. Under “Import” choose the accounting department's bond ledger (.xlsx) and “Read”. Each series is reconciled against the Excel total row; matching ones show “OK”. Check the first 20 rows and “Import”. Existing bond numbers are updated, new ones added.

Works well with

Start with just the features you need. If nothing fits the way you work, we'll build it for you — free.

Get started →🎁 Get a custom app, free